
How to make art prints from originals
Do you want to produce high-quality prints of your original art? There’s a good market for quality prints as many people don’t want to stump up the huge price of original works. A well-produced print can look just as good on the wall.
As an artist, I have a good camera that I use to take photos of my works for posting on social media. But to create full-size giclée prints that are an accurate reproduction of the originals takes more effort. I have it done by a professional photographer who has the experience and equipment to make a first-class job of it. Here are a few things you need to think about.
Creating a digital image from your artwork
First, you’ll need a high resolution image of your artwork. This can be done by taking a photograph with a professional camera. To make a good A3 size print, you need an image that is at least 18 Mpx (megapixels), preferably higher. The prints on this website are from images shot at 80 Mpx.
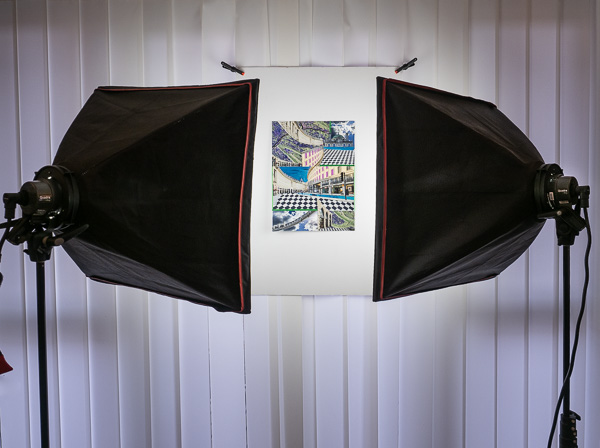
When photographing the artwork, you must have even illumination. We use two studio lights and adjust the positioning so that the light intensity is even across the whole area, measured with a light meter.
As a mixed-media collage artist I put effort into finding the right colours for my works. It is crucial that the colours are accurately reproduced in the print. This means, first of all, having the right camera settings, consistent with the characteristics of the lighting that you’re using.
The choice of the camera lens is also important, to avoid any distortion and to ensure sharpness from edge to edge.
Post-processing the image of your art
You transfer the image file from your camera to your computer. You should be using a good professional display monitor that is capable of displaying a wide palette of colours (ordinary computer screens are often more restricted).
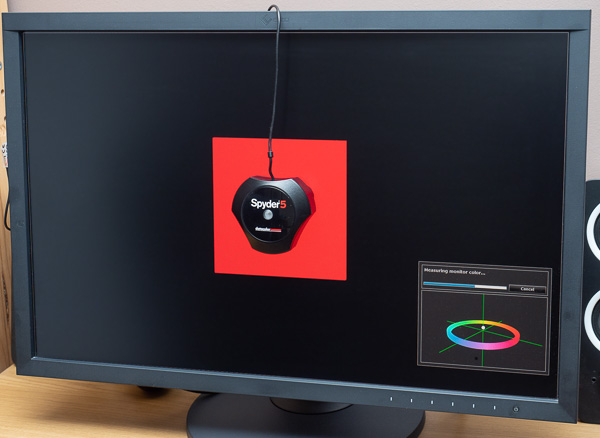
It’s very important that you regularly calibrate your monitor using a proper calibration device. This ensures that colours are displayed accurately.
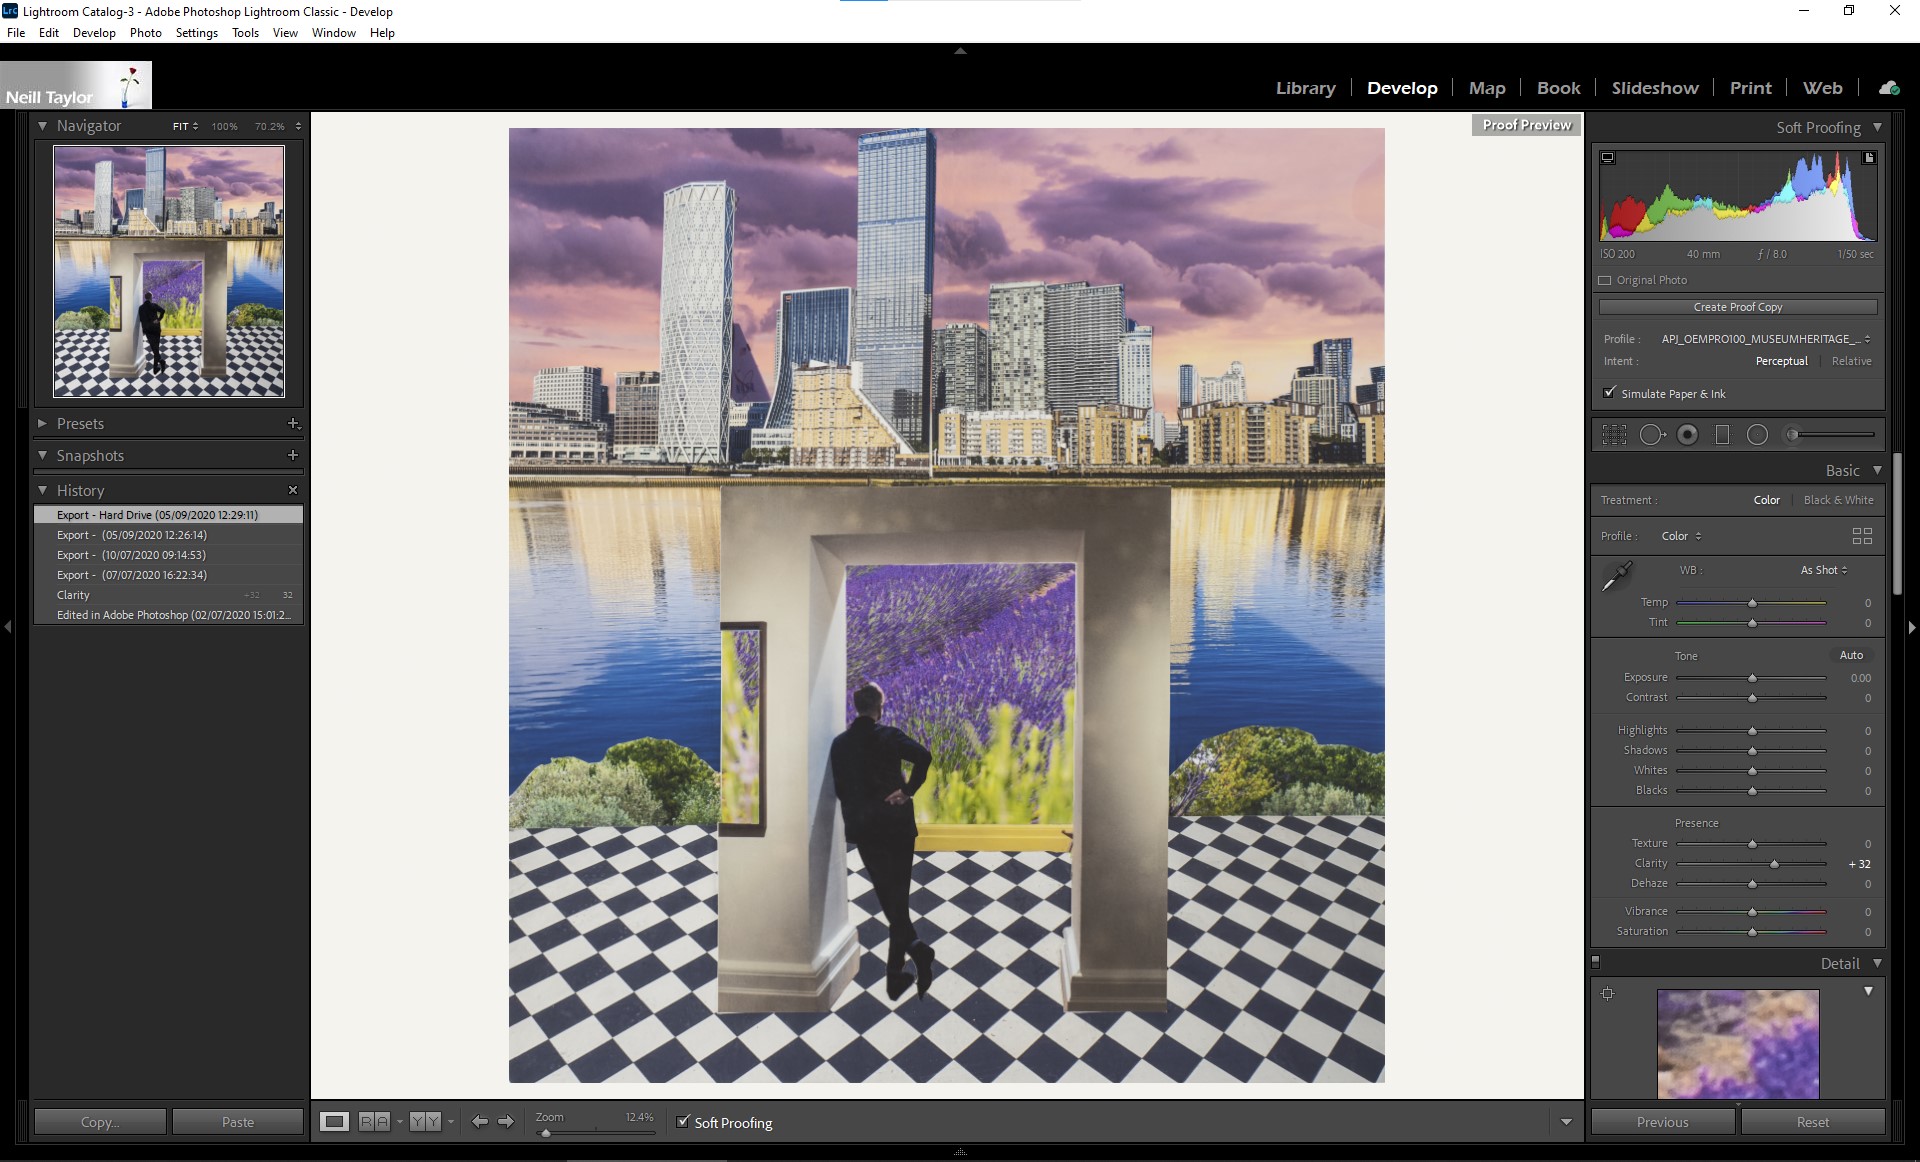
Check the colours in the image, comparing with the original illuminated by daylight (but not direct sun). You can make adjustments, if necessary, using an application such as Photoshop. Here you can also crop to trim the edges of the image and make sure they are properly aligned vertically and horizontally.
Before printing, there’s a technique called “soft proofing”, which allows you to see what the colours will look like on the specific type of paper that you’re printing on. If any are not right, you have to correct them.
Producing the art print
You might want to send your final image, at the highest possible resolution, to a printing service online. There are many available at quite a range of prices. You’ll only know if the quality meets your expectations by trying one out, perhaps by having a smaller print done first as a trial.
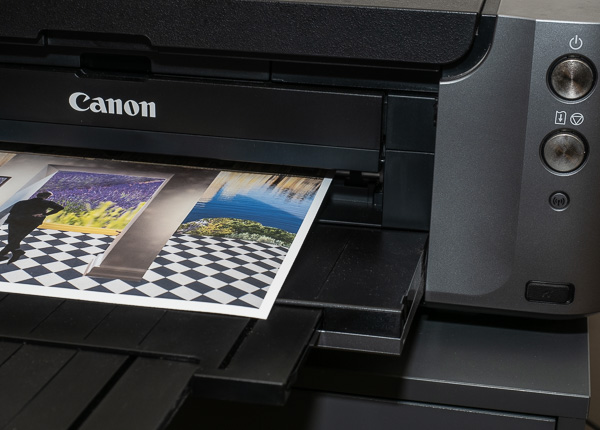
But if you want to keep control of the whole process, as we do, you’ll want to do the printing yourself. We do it ourselves to ensure a faithful reproduction of the original, which can’t be guaranteed using online print services. You’ll need a good quality professional printer that produces giclée prints uses pigment-based inks.
There is a huge range of inkjet papers available from various suppliers, and every paper has a different finish and affects how the colours are printed. Choosing one that suits your artwork is something of a personal preference. You should aim for one that reproduces the colours accurately and also has a finish that’s suitable for your art prints. It might be worth getting a sample pack of different papers from the supplier of your choice, so you can make a comparison. We use Museum Heritage paper from Permajet, it has an acid-free cotton-mix base, with a water-resistant coating that gives great sharpness and tonal range. It’s a heavy 310 gsm and has a lovely random weave surface texture. Remember to leave a small margin on the print, so that it can be easily mounted and framed.
We find that by paying attention to detail in the whole of this process, we produce art prints that look just as good on the wall as the original artwork. Working with a photographer that you trust, and who already has the right equipment, keeps the cost down, and also ensures that you retain full ownership of your artwork. Make sure that this is clear in the terms of any contract that you have with a photographer or print service, so that you keep the full rights to the use of your work, even if the photographer retains copyright to the photo.